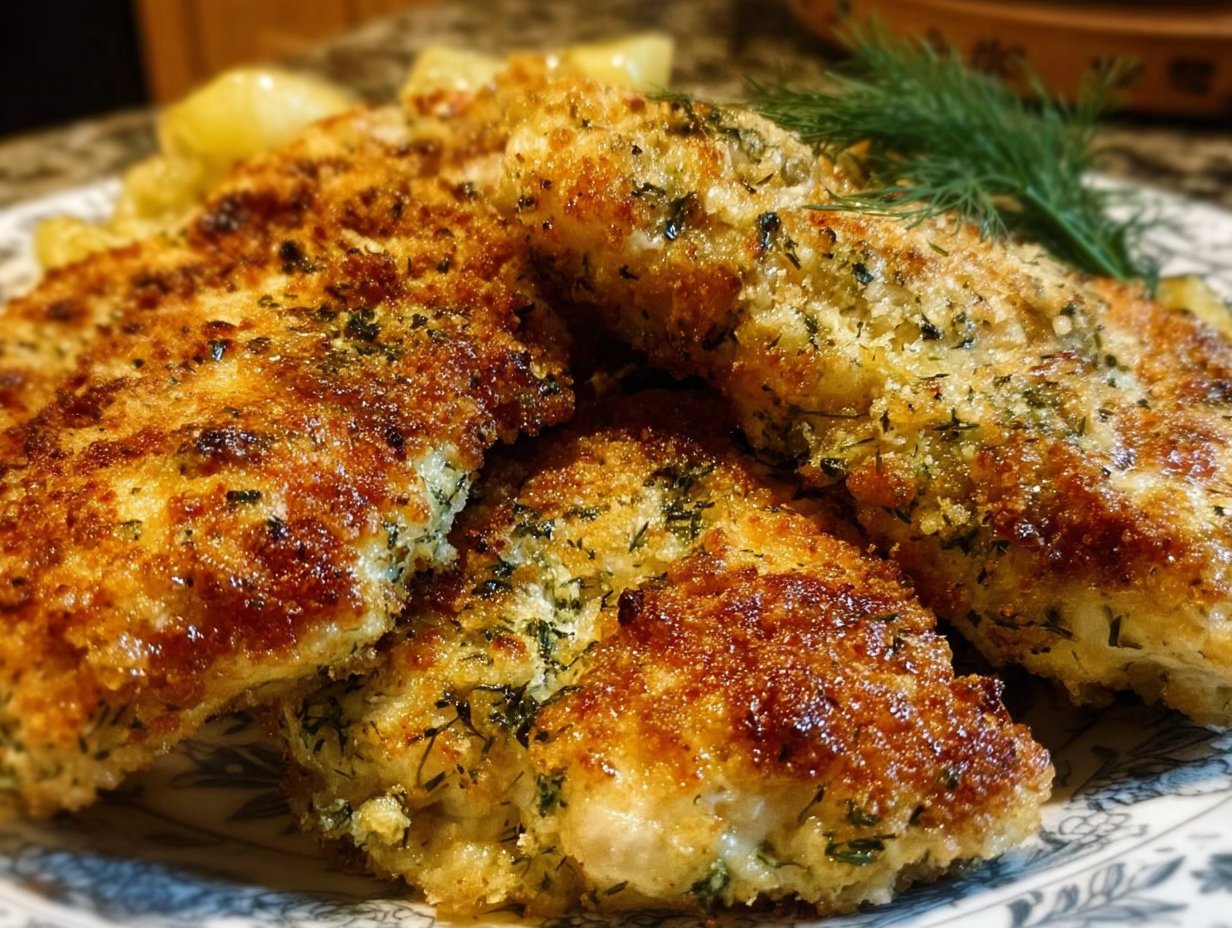
Dill Pickle Parmesan Chicken
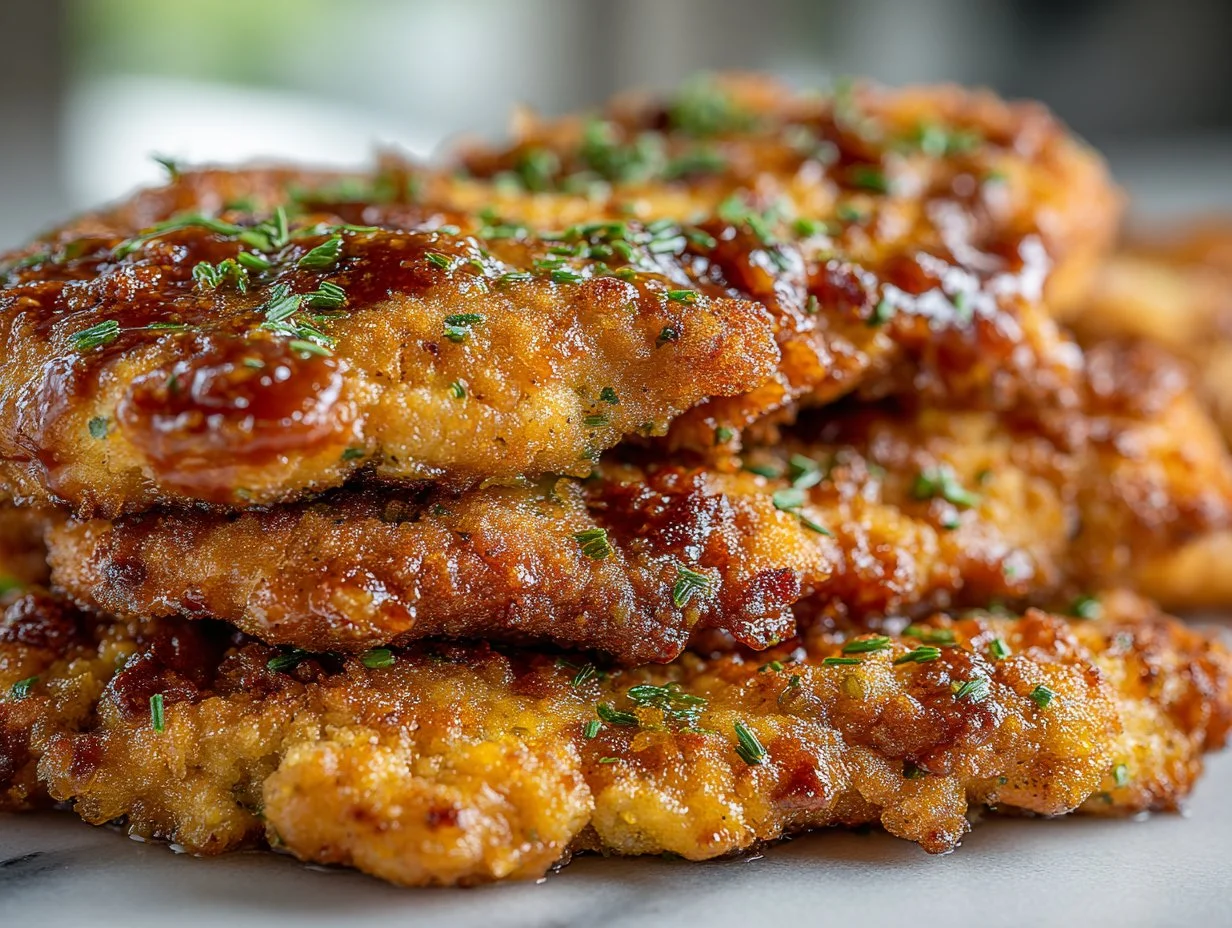
I first made this Dill Pickle Parmesan Chicken on a lazy Tuesday when the fridge held one lonely jar of pickles and a bag of panko. The result surprised everyone — bright, tangy pickle flavor baked into a crunchy, cheesy coating that’s equal parts playful and comforting. It’s the kind of weeknight winner that feels special without much fuss, and if you’re curious about other takes on this dish, try this dill pickle parmesan chicken for another home-cook’s version.
Why you’ll love this dish
This recipe pairs the sharp bite of dill pickle with nutty Parmesan and a satisfyingly crunchy panko crust. It’s quick to assemble, uses pantry-friendly ingredients, and scales easily for family dinners or meal prep. Kids often love the familiar crispy coating, while adults appreciate the tang from the pickle juice — making it both crowd-pleasing and a little adventurous.
“A fun twist on baked chicken — tangy, crispy, and surprisingly addicting. Great for weeknights when you want something different but simple.” — A reader’s quick take
The cooking process explained
Before you get into bowls and breadcrumbs, here’s a short overview so you know what to expect:
- Chop pickles and mix with pickle juice to make a tangy binder.
- Whisk eggs and combine with the pickle mixture.
- Mix panko, Parmesan and seasonings for the crust.
- Dip chicken in the egg-pickle mix, press into the breadcrumb blend, and place on a greased baking sheet.
- Lightly oil the tops and bake at 400°F (200°C) until golden and cooked through (internal temp 165°F / 74°C).
This is a short-bake method — minimal hands-on time, maximum crunch.
What you’ll need
- 4 boneless, skinless chicken breasts
- 1 cup dill pickles, finely chopped (crisp dill slices work best)
- 1 cup breadcrumbs (preferably panko for extra crunch)
- 1 cup grated Parmesan cheese
- 2 large eggs
- 1/4 cup dill pickle juice
- 1 tsp garlic powder
- 1 tsp onion powder
- 1/2 tsp salt
- 1/2 tsp black pepper
- 1/4 tsp cayenne pepper (optional, for heat)
- Cooking spray or olive oil for greasing
Notes and swaps: Use crushed cornflakes or crushed crackers if you don’t have panko. For a gluten-free option, swap in certified gluten-free breadcrumbs. To keep the pickle theme going, serve with a side of crispy homemade chips — like these air-fryer dill pickle chips.
How to prepare it
- Preheat oven to 400°F (200°C). Grease a baking sheet with cooking spray or lightly oil it.
- In a medium bowl, stir together chopped dill pickles and the 1/4 cup pickle juice. Set aside.
- In a second bowl, beat the 2 eggs lightly. Add the pickle mixture to the eggs and mix until combined.
- In a third bowl, combine panko, grated Parmesan, garlic powder, onion powder, salt, pepper, and cayenne (if using). Mix well.
- Pat chicken breasts dry with paper towels. If breasts are uneven, lightly pound to an even thickness (about 3/4-inch) so they cook evenly.
- Dip each breast into the egg-and-pickle mixture, coating both sides. Let excess drip off.
- Press the chicken into the breadcrumb mixture, coating firmly so the crumbs adhere. Place on the prepared baking sheet.
- Repeat with all breasts. Lightly spray the tops with cooking spray or drizzle a teaspoon of olive oil over each to encourage browning.
- Bake 25–30 minutes, or until the crust is golden and the internal temperature reaches 165°F (74°C). Thicker breasts may need a few extra minutes.
- Let rest 3–5 minutes before serving to keep juices locked in.
Best ways to enjoy it
Serve hot with bright, fresh sides to balance the tangy crust. Ideas:
- Simple cabbage slaw or a crisp green salad with lemon vinaigrette.
- Roasted potatoes or garlic mashed potatoes for comfort.
- Turn it into a sandwich: layer sliced chicken on a toasted bun with lettuce, extra pickles, and a smear of mayo. For a richer pairing try something like a creamy garlic Parmesan sauce on the side.
- For meal prep, slice and store with steamed veggies and quinoa.
Storage and reheating tips
- Refrigerator: Store leftovers in an airtight container for 3–4 days. Let cool to room temperature (no more than two hours) before refrigerating.
- Freezer: Wrap each breast tightly in plastic wrap and place in a freezer-safe bag. Freeze up to 3 months. Thaw in the fridge overnight before reheating.
- Reheating: For best crispness, reheat in a 375°F (190°C) oven for 8–12 minutes or until warmed through. A toaster oven or air fryer also works well to revive crunch. Avoid microwaving if you want to keep the crust crisp — it makes it soggy.
Pro chef tips
- Even thickness is everything: Pound breasts to an even thickness so the crust browns before the meat overcooks.
- Use a wire rack: If you have one, bake the chicken on a wire rack set over a sheet pan for air circulation and a crisper bottom.
- Don’t skimp on oil: A light spray or brush of oil on the crust promotes better golden color and flavor.
- Double-dip option: For an extra-thick crust, dip once in egg/pickle mix, then breadcrumbs, then back into egg and again into crumbs. Press firmly between coats.
- Temperature check: Use an instant-read thermometer. 165°F (74°C) is safe and ensures moist chicken.
Creative twists
- Air-fryer version: Cook at 380°F (190°C) for 12–15 minutes, flipping halfway. Spray well with oil first.
- Spicy pickle: Use spicy pickles or add extra cayenne for heat.
- Thighs instead of breasts: Boneless skinless thighs stay juicier and are more forgiving if overcooked. Adjust bake time down slightly.
- Dairy-free: Replace Parmesan with toasted nutritional yeast and use a flavorful gluten-free breadcrumb.
- Sandwiching: Top with sliced Swiss or cheddar under a broiler for a melty sandwich option.

Common questions
Q: How long does this take from start to finish?
A: Active prep is about 15–20 minutes. Bake time is 25–30 minutes, so plan 40–55 minutes total depending on thickness.
Q: Can I marinate the chicken in pickle juice first?
A: Yes — a 15–30 minute quick pickle-brine will add extra tang and tenderness. Don’t brine longer than 2 hours or the acid can change the texture.
Q: Are dill relish or sweet pickles okay?
A: Finely chopped dill pickles give the classic flavor. Sweet pickles will add sugar and a different profile; relish can work but may add extra moisture. Adjust salt and sugar accordingly.
Q: Can I make this gluten-free?
A: Absolutely. Use certified gluten-free panko or crushed gluten-free crackers for the same crunch.
Q: How do I keep the crust from falling off?
A: Press the breadcrumbs firmly into the egg-coated chicken. Allow the coated breasts to rest 5–10 minutes before baking so the crust adheres better.
Conclusion
If you want more inspiration or alternative methods, check out this rustic take from I Am Homesteader’s Dill Pickle Parmesan Chicken, and for meal-prep ideas try the practical spin on Dill Pickle Chicken Recipe | Great for Meal Prep!. Both are useful companions whether you’re refining the bake method or prepping multiple portions for the week.
Dill Pickle Parmesan Chicken

Ingredients
Main Ingredients
- 4 pieces boneless, skinless chicken breasts Flatten to an even thickness for uniform cooking.
- 1 cup dill pickles, finely chopped Crisp dill slices work best.
- 1 cup breadcrumbs (preferably panko) Panko adds extra crunch.
- 1 cup grated Parmesan cheese
- 2 large eggs Lightly beaten.
- 1/4 cup dill pickle juice
Seasonings
- 1 tsp garlic powder
- 1 tsp onion powder
- 1/2 tsp salt
- 1/2 tsp black pepper
- 1/4 tsp cayenne pepper Optional for heat.
For Greasing
- as needed Cooking spray or olive oil For greasing the baking sheet.
Instructions
Preparation
- Preheat oven to 400°F (200°C) and grease a baking sheet with cooking spray or lightly oil it.
- In a medium bowl, stir together chopped dill pickles and the 1/4 cup pickle juice. Set aside.
- In another bowl, beat the eggs lightly and mix in the pickle mixture until combined.
- In a third bowl, combine panko, Parmesan, garlic powder, onion powder, salt, pepper, and cayenne (if using). Mix well.
- Pat chicken breasts dry with paper towels. Pound to an even thickness if necessary.
Coating
- Dip each chicken breast into the egg-and-pickle mixture, coating both sides and letting excess drip off.
- Press the chicken into the breadcrumb mixture, coating firmly so the crumbs adhere. Place on the prepared baking sheet.
Baking
- Lightly spray the tops with cooking spray or drizzle olive oil over each piece.
- Bake for 25–30 minutes or until the crust is golden and chicken reaches an internal temperature of 165°F (74°C). Thicker breasts may need extra time.
- Let rest for 3–5 minutes before serving.