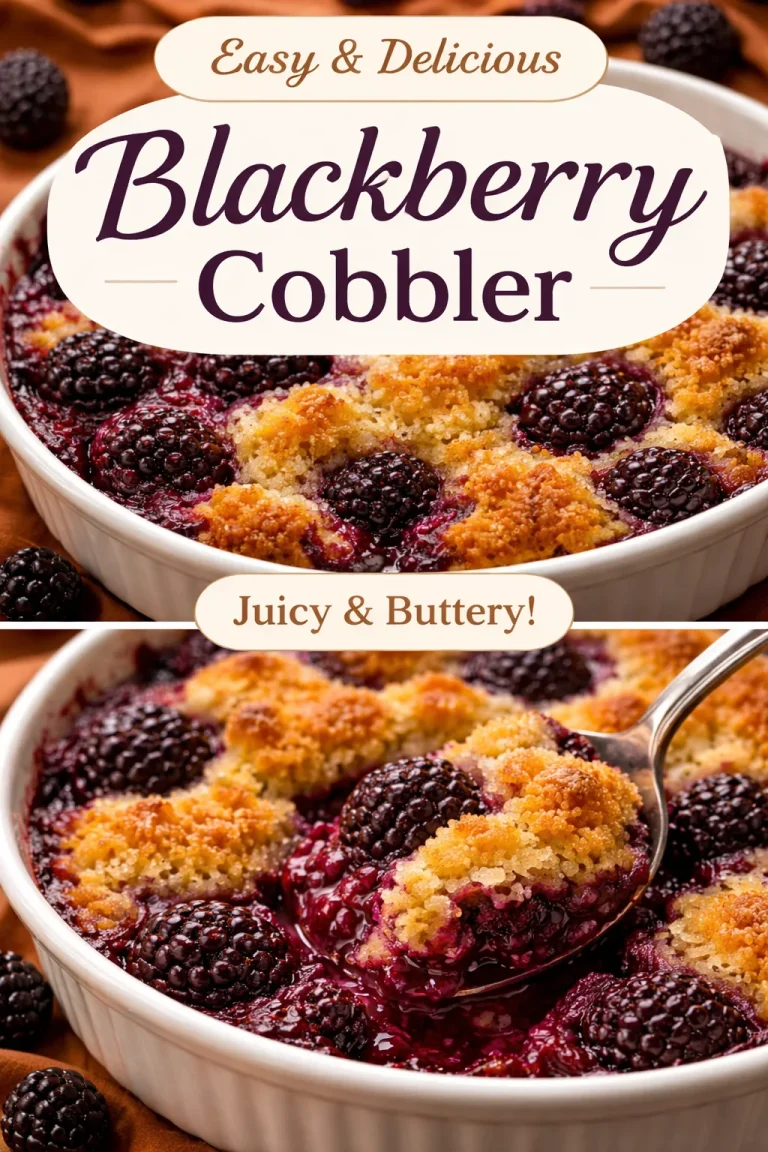
Amazing Blackberry Crumble Pie

I still remember the first time I spooned warm blackberry crumble over a flaky pie crust — the jammy blackberries and the toasty oat topping felt like the perfect end to a long summer day. This Amazing Blackberry Crumble Pie is exactly that: simple, rustic, and built from pantry-friendly ingredients so you can make it any night you’re craving something fruity and comforting. If you love berry desserts, you might also enjoy a different twist on seasonal fruit with this strawberry-rhubarb crumble pie I often serve alongside.
Why you’ll love this dish
This pie hits a sweet spot between an old-fashioned fruit pie and a crumble. It’s quick to pull together, needs no lattice or fancy pastry skills, and uses a single crust plus a simple buttery crumble. Perfect for casual dinners, potlucks, or a last-minute dessert for guests. Kids and grandparents alike tend to love it because the topping is familiar (oats and brown sugar) while the filling is bright and slightly tart.
“Like summer tucked into a slice — juicy blackberries with a crunchy, buttery top. A family favorite.” — home baker review
Step-by-step overview
- Mix fresh blackberries with sugar, cornstarch, and lemon to create a glossy, thickened filling.
- Press a pie crust into a dish and pour in the berry filling.
- Combine flour, oats, brown sugar, and cinnamon, then cut in cold butter until coarse crumbs form.
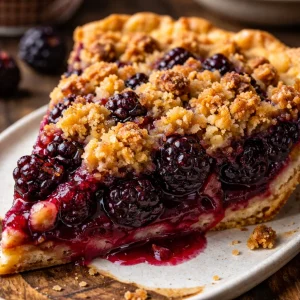
- Scatter the crumble evenly over the berries and bake until bubbling and golden.
- Cool slightly before slicing so the filling sets but remains wonderfully saucy.
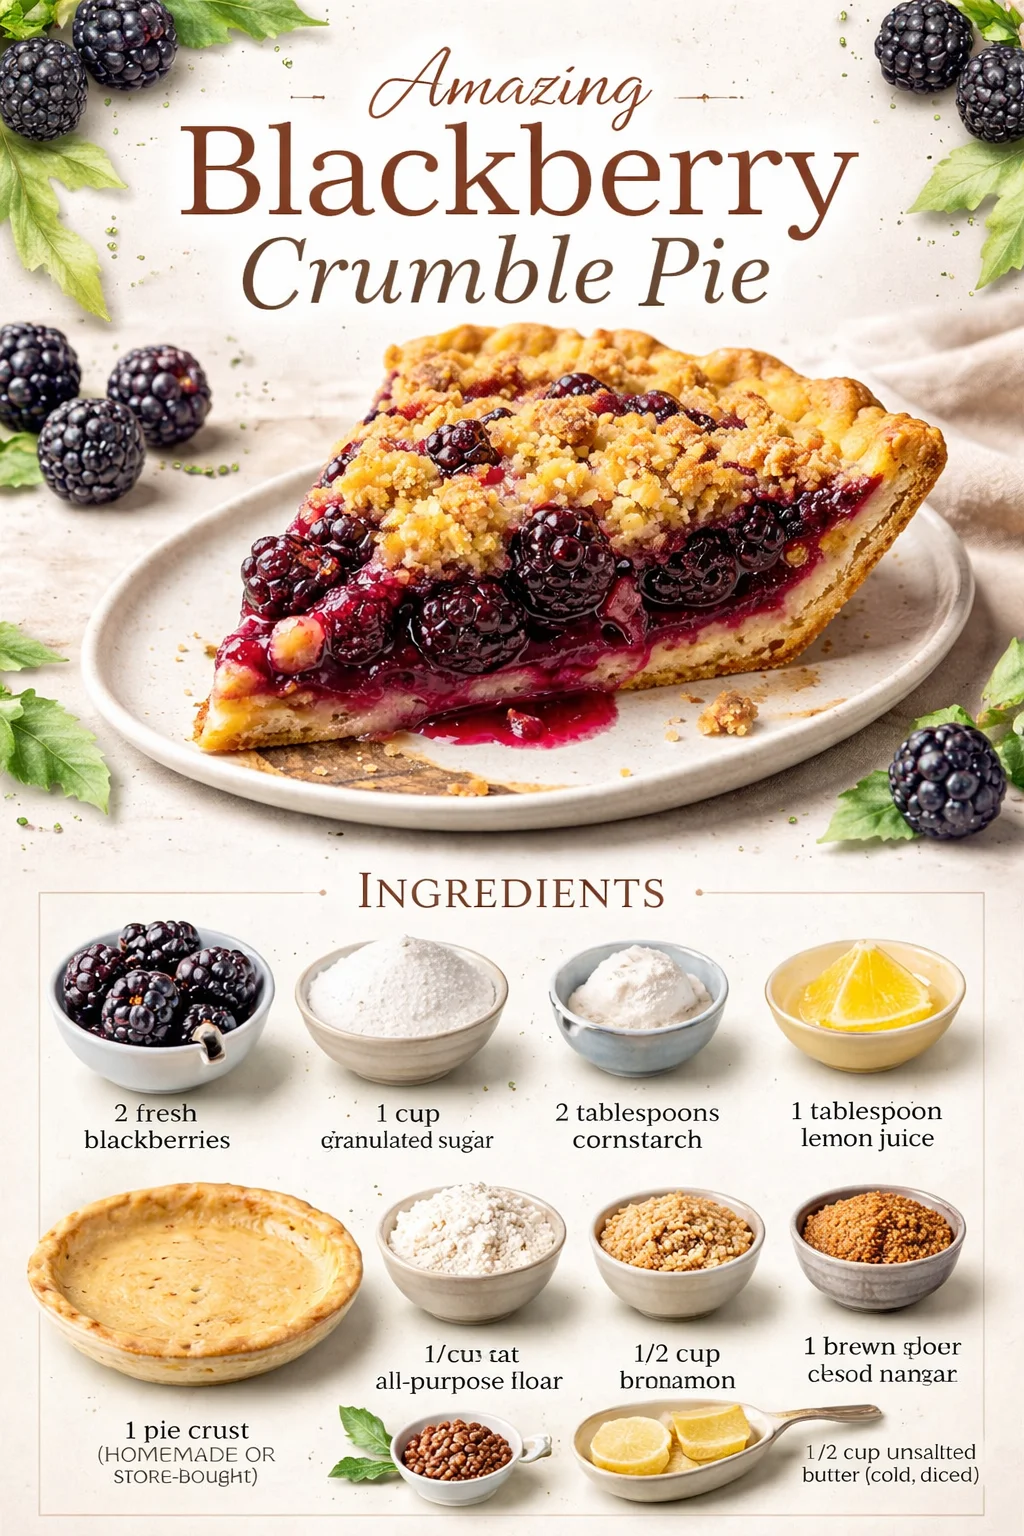
What you’ll need
- 2 cups fresh blackberries (or frozen, thawed and drained)
- 1 cup granulated sugar
- 2 tablespoons cornstarch (for thickening)
- 1 tablespoon lemon juice (brightens the berries)
- 1 pie crust (homemade or store-bought)
- 1 cup all-purpose flour
- 1/2 cup rolled oats (old-fashioned for texture)
- 1/2 cup brown sugar (light or dark)
- 1/2 teaspoon cinnamon
- 1/2 cup unsalted butter, cold and diced (for the crumble)
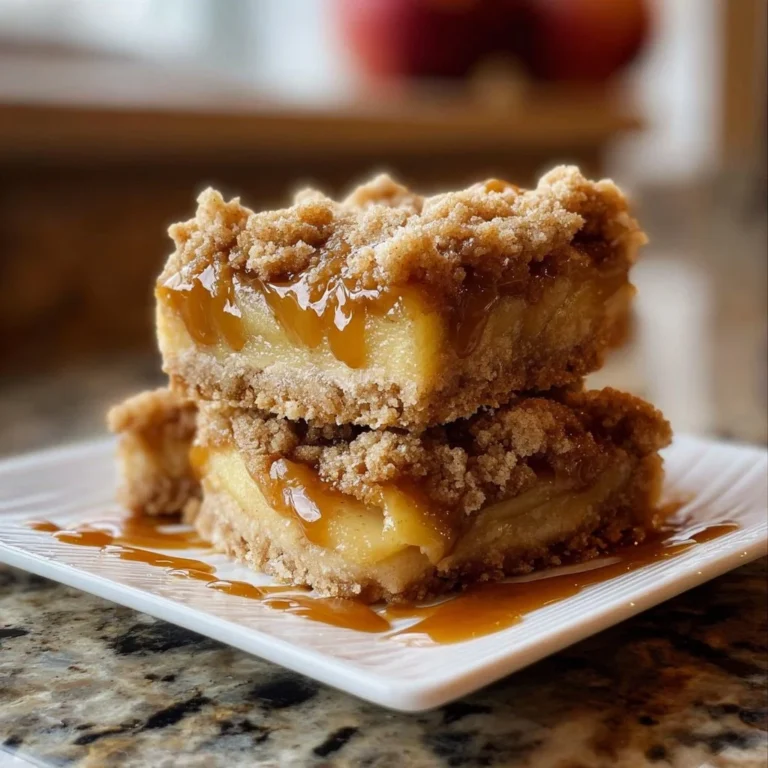
Notes and substitutions: use 1 teaspoon lemon zest for extra brightness; swap cornstarch for 2 tablespoons tapioca if you prefer a clearer filling. For a deeper, spiced sweetness you can riff on apple flavors like in this apple butter pie — the pantry overlap means small tweaks can change the profile easily.
Directions to follow
- Preheat your oven to 350°F (175°C).
- In a medium bowl, toss the blackberries with granulated sugar, cornstarch, and lemon juice until evenly coated. Set aside for a few minutes so the sugar begins to draw juices.
- Fit the pie crust into a 9-inch pie pan and crimp the edges. Pour the blackberry mixture into the crust and spread it evenly.
- In another bowl, whisk together the flour, rolled oats, brown sugar, and cinnamon.
- Add the cold diced butter and cut it into the dry mix using a pastry cutter, two knives, or your fingertips until the mixture looks like coarse crumbs. If you need a quick refresher on working cold butter into oats, a method guide like this one can help for similar techniques.
- Evenly sprinkle the crumble mixture over the blackberry filling, covering as much of the fruit as possible.
- Bake for 40–45 minutes. The topping should be golden brown and the filling should be bubbling at the edges. If the topping browns too quickly, tent loosely with foil for the last 10–15 minutes.
- Let the pie cool on a rack for at least 20–30 minutes before slicing so the filling sets. Serve warm or at room temperature.
Best ways to enjoy it
Serve generous slices with a scoop of vanilla ice cream, a dollop of whipped cream, or a spoonful of crème fraîche. For a picnic or brunch, slice and box it with savory items — I often pair this with sandwiches or salads like an egg salad for a balanced spread. For a cozy, fall-style dessert, serve with a mug of hot cider or strong coffee.
Storage and reheating tips
- Room temperature: Cover loosely and keep for up to 24 hours.
- Refrigerator: Store covered for up to 4 days. Reheat individual slices in a microwave for 20–30 seconds or in a 325°F oven for 8–10 minutes to refresh the topping.
- Freezing: Wrap the whole baked pie tightly in plastic wrap and foil; freeze up to 2 months. Thaw overnight in the refrigerator and rewarm in a 325°F oven for 20–30 minutes.
Always let a hot pie cool to near room temperature before refrigerating to prevent sogginess and to keep your fridge from working too hard.
Pro chef tips
- Keep the butter very cold for the best crumb texture; warm butter makes a greasy, compact topping.
- If your berries are on the tart side, add up to 1/4 cup more sugar, or a tablespoon of honey for a more complex sweetness.
- For crispier topping, bake on the lower rack so the bottom crust gets more direct heat.
- Toast the oats lightly in a dry skillet for a nuttier crumble. For more ideas on adding warm spices to dessert baking, this apple-cider whoopie pie has inspiration you can borrow.
- If using frozen berries, do not thaw completely — a little ice helps prevent over-softening during mixing.
Creative twists
- Mixed berry: Swap half the blackberries for raspberries or blueberries.
- Nutty crunch: Add 1/3 cup chopped pecans or almonds to the crumble.
- Gluten-free: Use a 1-to-1 gluten-free flour blend and certified gluten-free oats.
- Vegan: Replace butter with chilled coconut oil or vegan butter and use a vegan pie crust.
- Boozy boost: Stir 1 tablespoon of bourbon or dark rum into the berry mix for an adult twist.

Common questions
Q: Can I use frozen blackberries?
A: Yes. Use frozen berries straight from the freezer or partially thawed and drained. You may need an extra tablespoon of cornstarch to account for extra juice.
Q: How long does it take to set after baking?
A: Let it cool 20–30 minutes for the filling to thicken. If you prefer cleaner slices, cool completely (or refrigerate) before cutting.
Q: My topping browned too fast — what went wrong?
A: The oven rack may be too high. Tent with foil and move the pie to a lower rack to finish baking. Also ensure butter isn’t melting before it goes into the oven.
Q: Can I make this ahead?
A: Yes. Assemble the pie and keep it covered in the fridge for up to 24 hours before baking. Alternatively, freeze unbaked and bake from frozen, adding 10–15 minutes to the bake time.
Q: Is cornstarch necessary?
A: Cornstarch thickens the juices so slices hold together. You can use tapioca or arrowroot in equivalent amounts if you prefer.
Conclusion
This Amazing Blackberry Crumble Pie is an easy, crowd-pleasing dessert that balances bright fruit and a crunchy, buttery topping — ideal for casual dinners, potlucks, or a weekend treat. For another classic take on blackberry crumble, see this Easy Blackberry Crumble Pie from The Café Sucre Farine, and for a slightly different method and serving inspiration check out the Blackberry Crumble Pie at Cheese Curd In Paradise. Enjoy a slice warm, and don’t be afraid to make it your own.
Blackberry Crumble Pie
Ingredients
For the filling
- 2 cups fresh blackberries (or frozen, thawed and drained)
- 1 cup granulated sugar Adjust based on the tartness of the berries.
- 2 tablespoons cornstarch For thickening the filling.
- 1 tablespoon lemon juice Brightens the flavor of the berries.
For the pie crust
- 1 pie crust (homemade or store-bought)
For the crumble topping
- 1 cup all-purpose flour
- 1/2 cup rolled oats Old-fashioned for better texture.
- 1/2 cup brown sugar Can use light or dark.
- 1/2 teaspoon cinnamon
- 1/2 cup unsalted butter, cold and diced Key for crumble texture.
Instructions
Preparation
- Preheat your oven to 350°F (175°C).
- In a medium bowl, toss the blackberries with granulated sugar, cornstarch, and lemon juice until evenly coated. Set aside.
- Fit the pie crust into a 9-inch pie pan and crimp the edges. Pour the blackberry mixture into the crust.
- In another bowl, whisk together the flour, rolled oats, brown sugar, and cinnamon.
- Cut in the cold diced butter until the mixture looks like coarse crumbs.
Baking
- Evenly sprinkle the crumble mixture over the blackberry filling.
- Bake for 40–45 minutes until the topping is golden brown and the filling is bubbling.
- Let the pie cool on a rack for at least 20–30 minutes before slicing.