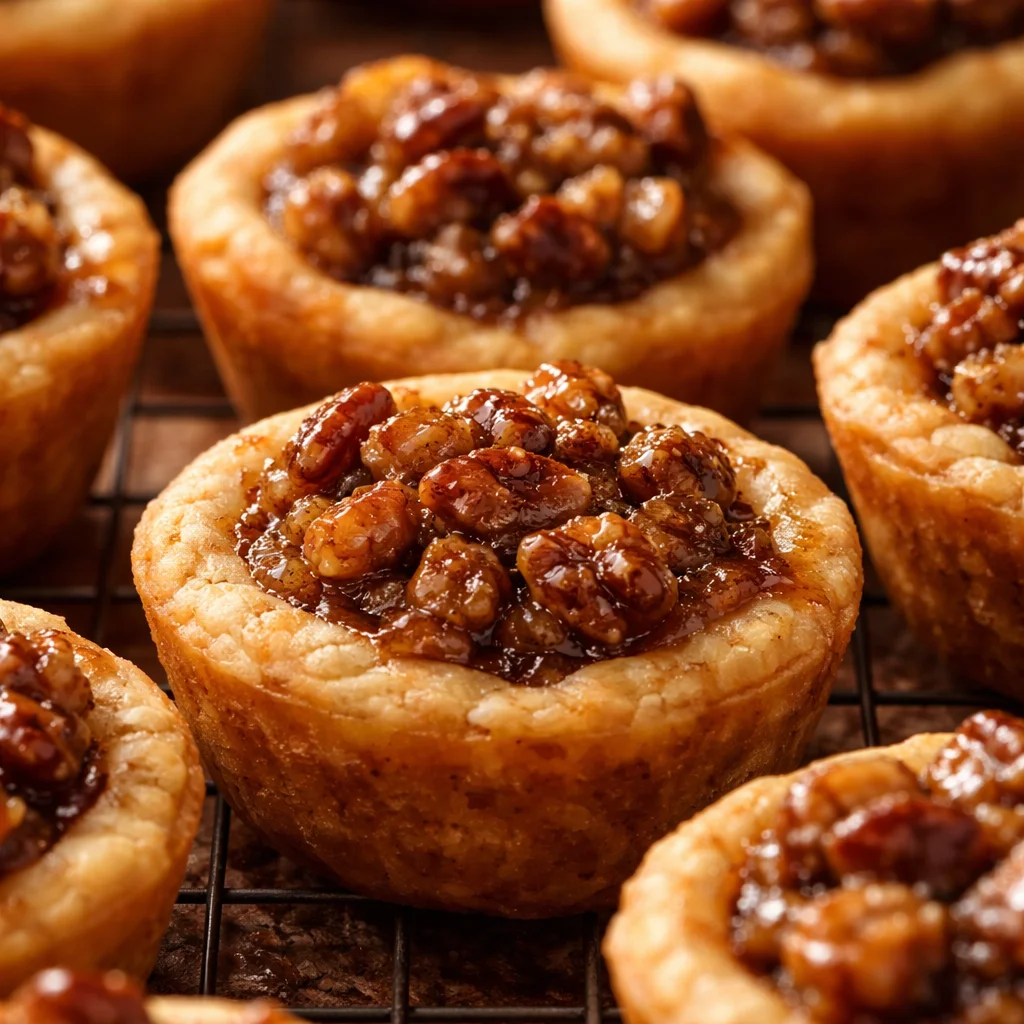
Pecan Tassies

I remember the first time I made these Pecan Tassies — the kitchen smelled like toasted nuts and brown butter (well, buttery sugar), and everyone reached for seconds. These tiny tarts are a perfect balance of a tender, tangy cream-cheese crust and a gooey, pecan-studded filling. They work as holiday bite-sized desserts, a potluck favorite, or a quick sweet to brighten a coffee break.
Why you’ll love this dish
Pecan Tassies are tiny but mighty: they deliver the caramel-pecan flavor of a pecan pie in an easy-to-eat, portable package. They’re faster to assemble than a full pie, require simple pantry staples, and are crowd-pleasers for parties and cookie exchanges.
“These little tarts disappeared faster than cookies at a bake sale — crisp edges, soft centers, and a rich pecan filling.” — a happy tester
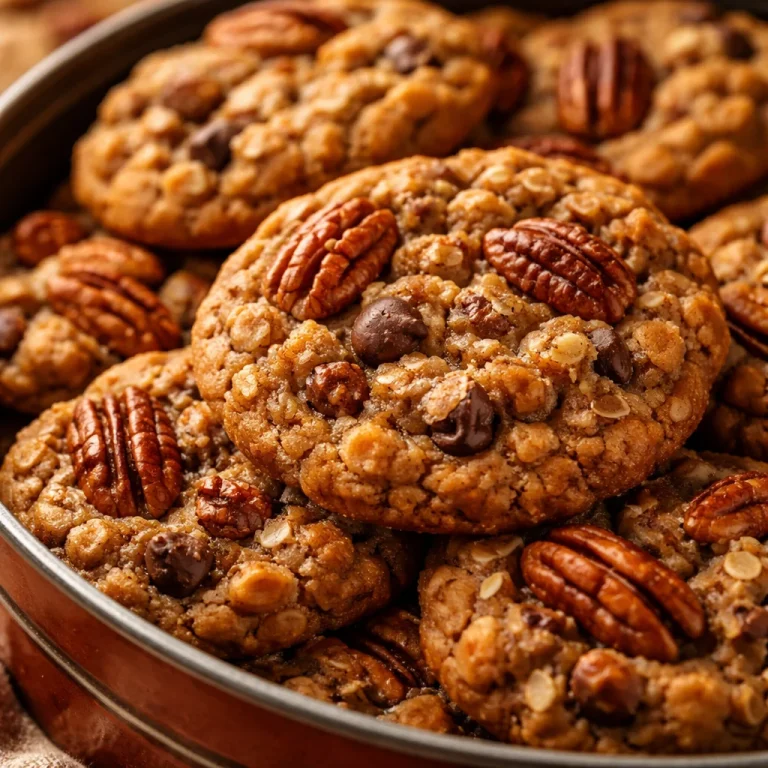
They’re also great when you want dessert without committing to a whole pie. If you like pecan-focused treats, you might also enjoy a different take on pecan cookies like this browned butter pecan cookies for a chewy, nut-forward option.
How this recipe comes together
This recipe is a straightforward two-part build: make a short, cream-cheese pastry, press it into mini muffin cups, then spoon in a pecan-sugar-egg filling and bake. Expect about 10–15 minutes prep and 20–25 minutes baking. The crust sets up crisp at the edges but stays tender; the filling should be slightly set and glossy when done.
For a similar small-cookie technique using a nut-forward crust, see this butter pecan cookies (creamy crust variation) which uses many of the same flavor principles.
What you’ll need
- 3 oz cream cheese (softened) — room temperature makes mixing easier
- 1/2 cup (1 stick) unsalted butter (softened)
- 1 cup all-purpose flour
- 1 cup chopped pecans (lightly toasted for more flavor)
- 1 cup packed brown sugar (light or dark)
- 2 large eggs
- 1 tsp vanilla extract
- 1/2 tsp salt
Notes and substitutions:
- For a slightly more tender crust, you can substitute half the all-purpose flour with cake flour.
- Use pecan halves for a prettier top; chop the rest for the filling.
- If you need a dairy-free version, try a vegan cream cheese and a plant-based butter — texture will vary.
Directions to follow
- Preheat oven to 350°F (175°C). Grease a mini muffin tin or use nonstick spray.
- In a mixing bowl, beat the softened cream cheese and butter until smooth. Add the flour and mix until a soft dough forms. It should be pliable and not sticky.
- Press about a teaspoon of dough into each mini muffin cup, forming a thin cup with slightly raised edges. Chill the tin in the fridge for 5–10 minutes if the dough gets too soft.
- In a separate bowl, whisk together the chopped pecans, brown sugar, eggs, vanilla, and salt until combined.
- Spoon the pecan filling into each prepared crust, filling nearly to the top but leaving a little room for bubbling.
- Bake 20–25 minutes, or until the filling is set and the tops are golden brown. Rotate the pan halfway through if your oven has hot spots.
- Let the tartlets cool in the pan for 10 minutes, then transfer to a wire rack to cool completely before serving.
If you’d like more ideas using butter and pecan combinations, try these bakery-style treats: bakery-style milk chocolate pecan cookies.
Best ways to enjoy it
Serve warm or at room temperature. A few pairing ideas:
- With a scoop of vanilla ice cream or a drizzle of caramel sauce for a decadent treat.
- On a holiday dessert platter mixed with cookies and fudge.
- Alongside coffee, latte, or a nutty tea for afternoon guests.
- Garnish with a halved pecan on top before baking for a classic look.
Plating tip: place tassies in small cupcake liners on a wooden board or tiered tray for a festive display.
Storage and reheating tips
- Room temperature: store in an airtight container for up to 48 hours.
- Refrigerator: keep in an airtight container for up to 5–7 days (eggs in the filling justify refrigeration if you want longer storage).
- Freezing: freeze cooled tassies in a single layer on a baking sheet until solid, then transfer to a freezer bag for up to 3 months. Thaw overnight in the fridge and warm briefly in a 325°F (160°C) oven for 5–7 minutes.
- Reheat: warm individual tassies in a 300–325°F oven for 5–8 minutes to revive a freshly-baked texture. Avoid microwaving if you want to keep the crust crisp.
Food safety: because the filling contains eggs, refrigerate leftovers if you won’t eat them within a day or two.
Pro chef tips
- Chill the dough briefly before pressing into tins; it helps avoid overworking and shrinking.
- Toast the pecans lightly in a 350°F oven for 6–8 minutes to boost flavor — cool before chopping.
- Don’t overfill the cups; the filling expands slightly and can spill over.
- Use room-temperature eggs so the filling emulsifies smoothly and bakes evenly.
- If your mini tins are nonstick, a light spray is enough; otherwise, use paper liners for easy removal, though they’ll hide the crust edges.
For more small-batch pecan baking inspiration, check this alternate pecan cookie approach at butter pecan cookies with a crunch.
Creative twists
- Chocolate Pecan Tassies: stir 1/4 cup melted dark chocolate into the filling.
- Maple-pecan: swap half the brown sugar for pure maple syrup (reduce egg by a small amount if needed) for a maple-forward filling.
- Bourbon pecan: add 1–2 teaspoons bourbon to the filling for depth (leave out for a kid-friendly version).
- Mini cheesecake tassies: increase cream cheese in the crust for a tangier base, and top with a pecan glaze after baking.
- Gluten-free: use a 1:1 gluten-free flour blend in the crust — press gently and bake a few minutes longer if needed.

Your questions answered
Q: How long does it take to make these from start to finish?
A: Active prep is about 10–15 minutes; baking is 20–25 minutes. Include cooling for another 15–20 minutes, so plan around 45–60 minutes total.
Q: Can I make the crust ahead of time?
A: Yes. You can press the crust into the tins and refrigerate for up to 24 hours before filling and baking. Alternatively, freeze the pressed crusts for up to a month and thaw briefly before filling.
Q: Do the tassies need to be refrigerated because of the eggs?
A: If you plan to serve within a day or two, room temperature is fine in cool conditions. For longer storage (more than 48 hours) or in warm climates, refrigerate—especially since the filling contains eggs.
Q: Can I use pecan halves instead of chopped?
A: Yes — use halves for garnish and chop the rest for the filling. Using halves on top gives an attractive finish.
Q: My filling bubbles but seems slightly jiggly — is it done?
A: A little jiggle in the center is okay; the filling will set as it cools. If it’s very loose, add 3–5 minutes to bake time and check again.
Conclusion
If you want a tested small-batch pecan tart that’s easy to make and wildly shareable, these Pecan Tassies fit the bill perfectly. For another classic take on this Southern favorite, you can compare techniques with Classic Pecan Tassies – One Hot Oven®, or explore a similarly credited version at Pecan Tassies – Saving Room for Dessert.
Pecan Tassies

Ingredients
For the crust
- 3 oz cream cheese (softened) room temperature makes mixing easier
- 1/2 cup unsalted butter (softened)
- 1 cup all-purpose flour can substitute half with cake flour for a more tender crust
For the filling
- 1 cup chopped pecans lightly toasted for more flavor
- 1 cup packed brown sugar (light or dark)
- 2 large eggs room temperature recommended
- 1 tsp vanilla extract
- 1/2 tsp salt
Instructions
Preparation
- Preheat oven to 350°F (175°C). Grease a mini muffin tin or use nonstick spray.
- In a mixing bowl, beat the softened cream cheese and butter until smooth.
- Add the flour and mix until a soft dough forms. It should be pliable and not sticky.
- Press about a teaspoon of dough into each mini muffin cup, forming a thin cup with slightly raised edges.
- Chill the tin in the fridge for 5–10 minutes if the dough gets too soft.
Making the Filling
- In a separate bowl, whisk together the chopped pecans, brown sugar, eggs, vanilla, and salt until combined.
Baking
- Spoon the pecan filling into each prepared crust, filling nearly to the top but leaving a little room for bubbling.
- Bake for 20–25 minutes, or until the filling is set and the tops are golden brown.
- Let the tartlets cool in the pan for 10 minutes, then transfer to a wire rack to cool completely before serving.