Dairy Free Cheese Ball

I make this dairy-free cheese ball every time friends ask me to bring an appetizer — it’s creamy, tangy, and vanishes fast. It’s essentially a spreadable, party-ready “cheese” that skips dairy but keeps the rich, savory bite thanks to nutritional yeast and herbs. Perfect for holiday gatherings, vegan-friendly parties, or a quick snack when you want something more interesting than hummus. If you enjoy simple make-ahead snacks, you might also like my roundup of easy cheese ball ideas for inspiration.
Why you’ll love this dish
This dairy-free cheese ball is fast, forgiving, and budget-friendly. It uses pantry-friendly ingredients (nutritional yeast and dairy-free cream cheese) to recreate that familiar umami, but without lactose or cow’s milk. Because it’s made ahead and chills to firm up, it’s great for entertaining: make it in the morning and serve it in the evening. It’s also kid-friendly when you skip bold herbs or spices, and it pairs nicely with crackers, crudités, or even lettuce cups if you’re keeping carbs low.
“Creamy, nutty, and easy — everyone thought it was homemade cheese. I made it in 10 minutes and it was the first bowl to empty.” — a regular at my dinner parties
How this recipe comes together
Start by softening your dairy-free cream cheese so it blends easily. Add nutritional yeast for cheesy depth, then layer in garlic and onion powder for background savory notes. Fresh herbs brighten the mix and give it a homemade finish. After combining, shape and chill: refrigeration firms the spread so it’s easy to slice, spread, or scoop. Overall, expect about 10 minutes active prep and at least 1 hour chilling.
What you’ll need
- 1 cup dairy-free cream cheese (look for soy- or coconut-based brands you like; room temperature helps mixing)
- 1/2 cup nutritional yeast (adds a nutty, cheesy flavor)
- 1 teaspoon garlic powder
- 1 teaspoon onion powder
- 1 tablespoon fresh herbs, finely chopped (chives or parsley work best)
- Salt to taste (start with 1/4 teaspoon and adjust)
- Crackers and veggie slices for serving (carrots, cucumber, bell pepper)
Notes and substitutions:
- If you want tang, add 1 teaspoon lemon juice or 1/2 teaspoon apple cider vinegar.
- For a nuttier texture, fold in 1–2 tablespoons of finely chopped toasted nuts (almonds or walnuts).
- If you prefer a firmer texture without chilling long, form into a log and roll in crushed nuts or seeds to help it hold shape.

Step-by-step instructions
- Place the dairy-free cream cheese in a mixing bowl and let it come to room temperature for easier blending.
- Add the nutritional yeast, garlic powder, onion powder, and a pinch of salt.
- Stir or beat with a hand mixer until the mixture is smooth and creamy. Taste and adjust salt or seasoning.
- Fold in the fresh herbs gently so they’re evenly distributed.
- Shape the mixture into a ball or a log using your hands or a spatula. Wrap tightly in plastic wrap.
- Refrigerate for at least 1 hour to firm up. Chilling makes it easier to slice or scoop.
- Unwrap and serve with crackers and vegetable slices.
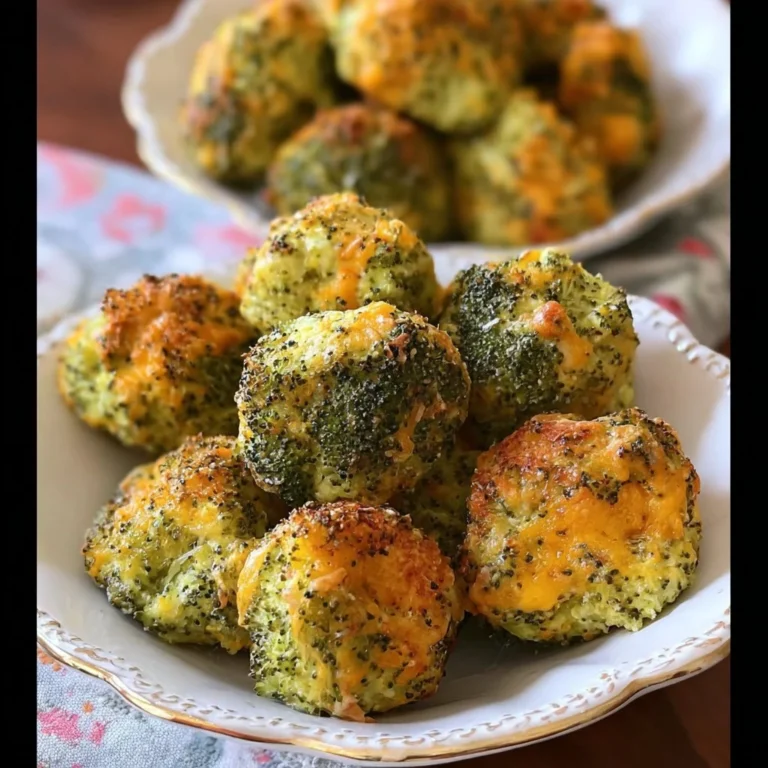
If you like hearty pairings, serve alongside crunchy snacks similar to the texture contrast in these baked recipes like broccoli cheese balls for a fuller snack board.
Best ways to enjoy it
- On a platter: place the cheese ball in the center with an assortment of crackers, toasted pita, and sliced veggies radiating outward.
- For grazing boards: add olives, pickles, and roasted nuts for variety.
- Sliders or sandwiches: slice a log-style cheese ball and melt slightly on a warm bun (watch coconut-based creams that can separate).
- Stuffed peppers: use a spoonful as a creamy filling for small sweet peppers or endive leaves.
How to store & freeze
Refrigeration: Store the wrapped cheese ball in the fridge for up to 5 days. Keep it airtight to avoid absorbing other fridge odors.
Freezing: You can freeze the shaped ball for up to 1 month. Wrap tightly in plastic and then foil or a freezer bag. Thaw overnight in the refrigerator before serving. Texture may soften slightly after freezing; stir before reshaping if needed.
Food safety: Keep chilled until serving. Discard if left out longer than 2 hours at room temperature (1 hour in hot environments over 90°F / 32°C).
Pro chef tips
- For the smoothest texture, use fully softened dairy-free cream cheese and beat it with a hand mixer for 30–45 seconds.
- Chill on a bed of crushed ice for an hour when serving outdoors to keep it safe and firm.
- Make it a day ahead — flavors meld and the taste improves after an overnight chill.
- If you want a nut-coated exterior, press chopped toasted nuts or seeds into the surface just before serving.
- For party prep ideas that combine savory crowd-pleasers, consider adding small protein bites like those found in this hearty Bourbon BBQ bacon cheeseburger meatball recipe to your spread.
Creative twists
- Smoky paprika & jalapeño: add 1/2 teaspoon smoked paprika and 1 tablespoon finely chopped pickled jalapeño for a smoky kick.
- Sundried tomato & basil: fold in 2 tablespoons finely chopped sundried tomatoes and 1 tablespoon basil.
- Cranberry & pecan: stir in 2 tablespoons chopped dried cranberries and roll the ball in chopped pecans for a holiday spin.
- Olive tapenade coating: press a thin layer of olive tapenade onto the outside for a Mediterranean twist.
- Make it spicy: mix in a dash of hot sauce or cayenne to taste.

Helpful answers
Q: How long does it take to make and chill?
A: Active prep is about 10 minutes. Chill at least 1 hour to firm; overnight chilling deepens flavor.
Q: Can I use homemade nut-based cream cheese?
A: Yes. Homemade cashew cream cheese works well. Make sure it’s thick enough — if it’s too loose, strain or add more nutritional yeast to thicken.
Q: Is nutritional yeast necessary?
A: Nutritional yeast provides the cheesy umami. You can reduce it, but flavor will be milder. Some people add a teaspoon of miso paste as an alternative for depth.
Q: Can I make this nut-free?
A: Absolutely. Use a soy- or coconut-based dairy-free cream cheese and avoid nut coatings. Check labels for cross-contamination if you have severe allergies.
Q: How do I prevent it from tasting bland?
A: Taste and adjust salt — dairy-free cheese bases often need a bit more salt. A touch of acid (lemon juice or vinegar) brightens the flavor.
Conclusion
This dairy-free cheese ball is an easy, reliable appetizer for vegans, lactose-intolerant guests, or anyone who loves bold, savory spreads. For more dairy-free inspiration and an alternate take on a gluten-free version, check out this Dairy Free Cheese Ball Recipe (Gluten Free) • The Fit Cookie. If you want another vegan cheese ball variation with different textures and flavors, try the Easy Vegan Cheese Ball – The Cheeky Chickpea.
Dairy-Free Cheese Ball

Ingredients
Cheese Ball Ingredients
- 1 cup dairy-free cream cheese Look for soy- or coconut-based brands; room temperature helps mixing
- 1/2 cup nutritional yeast Adds a nutty, cheesy flavor
- 1 teaspoon garlic powder
- 1 teaspoon onion powder
- 1 tablespoon fresh herbs, finely chopped Chives or parsley work best
- Salt to taste Start with 1/4 teaspoon and adjust
Serving Suggestions
- Crackers and veggie slices Carrots, cucumber, bell pepper
Instructions
Preparation
- Place the dairy-free cream cheese in a mixing bowl and let it come to room temperature for easier blending.
- Add the nutritional yeast, garlic powder, onion powder, and a pinch of salt.
- Stir or beat with a hand mixer until the mixture is smooth and creamy. Taste and adjust salt or seasoning.
- Fold in the fresh herbs gently so they’re evenly distributed.
- Shape the mixture into a ball or a log using your hands or a spatula. Wrap tightly in plastic wrap.
- Refrigerate for at least 1 hour to firm up. Chilling makes it easier to slice or scoop.
- Unwrap and serve with crackers and vegetable slices.