Making homemade bread might sound like a daunting task, but with this simple and easy bread recipe made in a blender, you’ll be enjoying fresh, homemade bread in no time. Perfect for breakfast or an afternoon snack, this recipe requires minimal effort and delivers maximum flavor. Let’s dive into how you can create this delicious bread using basic ingredients and a blender.
Ingredients
Before we start, gather the following ingredients:
- 500 grams (about 18 ounces) of all-purpose flour
- 1½ cups of warm milk
- 2 eggs
- 1 teaspoon of salt
- 2 tablespoons of sugar
- 1 sachet of baking powder (about 10 grams or 0.35 ounces)
- 2 tablespoons of butter
Instructions
Preparing the Mixture
- Blending the Wet Ingredients: Begin by placing all the ingredients except the flour into a blender. This includes the warm milk, eggs, salt, sugar, baking powder, and butter. Blend until you achieve a smooth mixture. This ensures that all the ingredients are well incorporated and the butter is evenly distributed.
Forming the Dough
- Incorporating the Flour: Gradually add the flour to the blender mixture, mixing well until you form a dough. This should take about 15 minutes. Be patient and ensure the flour is fully integrated to avoid lumps.
Preparing for Baking
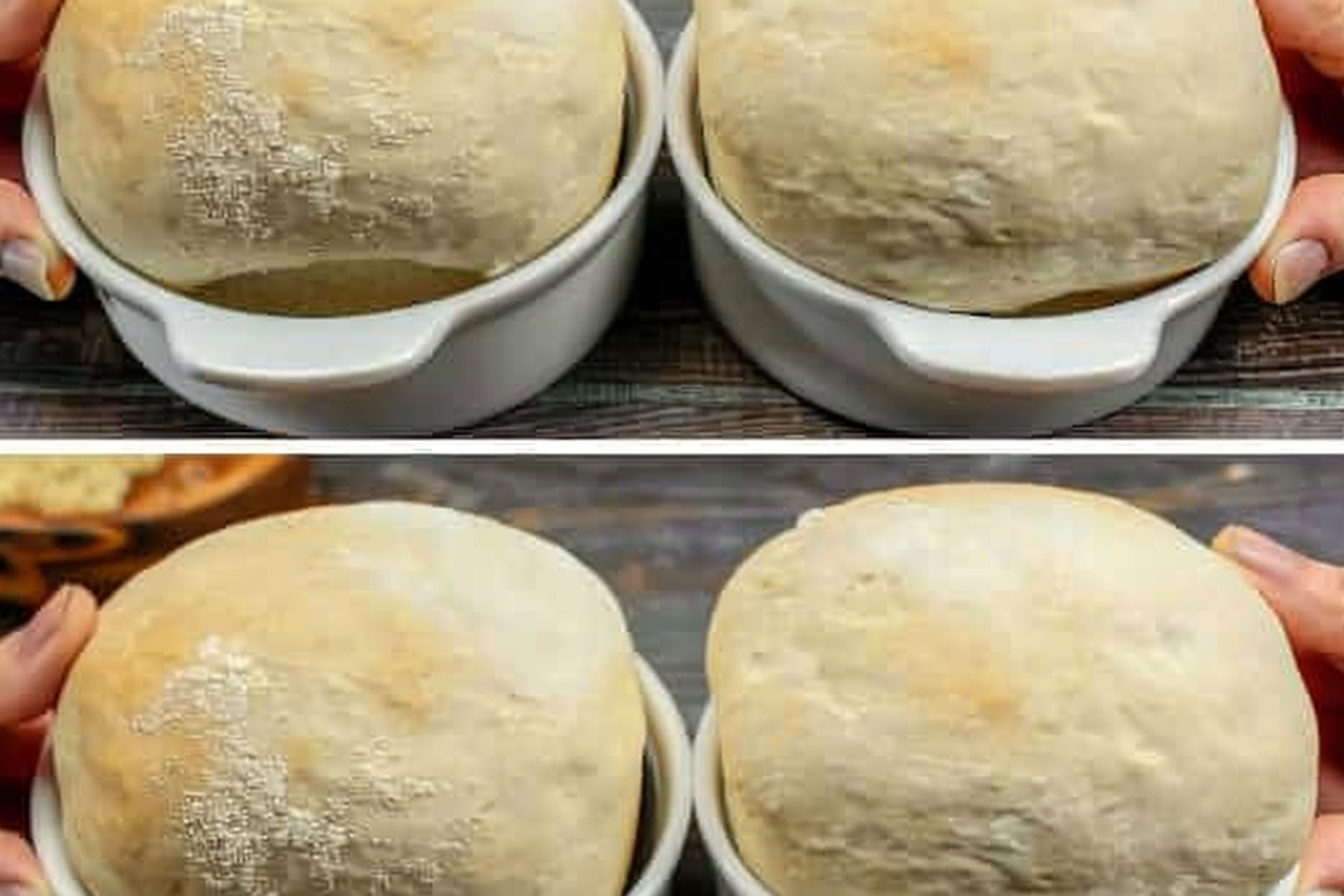
- Preparing the Pan: Pour the dough into a greased and floured baking pan, spreading it evenly. This helps prevent the bread from sticking and allows it to rise properly.
- Letting the Dough Rise: Let the dough rest for about 30 minutes, or until it doubles in volume. This step is crucial as it allows the yeast in the baking powder to activate, giving the bread its light and fluffy texture.
Baking the Bread
- Preheating the Oven: Preheat the oven to 180°C (350°F). This ensures the oven is at the right temperature when you’re ready to bake.
- Brushing the Dough: Brush the top of the dough with a mixture of beaten egg and a little milk. This step gives the bread a beautiful golden-brown crust.
- Baking: Bake for 35 to 40 minutes, or until the top is golden brown. The baking time can vary slightly, so keep an eye on the bread towards the end of the baking period.
Finishing Touches
- Cooling and Serving: Remove the bread from the oven and let it cool slightly. Then, remove it from the pan. Serve as desired, whether it’s with butter, jam, or simply on its own.
Tips for the Perfect Blender Bread
- Room Temperature Ingredients: Ensure the milk and butter are at room temperature before blending. This helps in achieving a smoother mixture.
- Gradual Flour Addition: Adding the flour gradually prevents the dough from becoming too dense and allows for better incorporation.
- Resting Time: Don’t skip the resting time. This step is essential for the dough to rise and develop the right texture.
- Oven Watch: Ovens can vary, so keep an eye on your bread during the last few minutes of baking to prevent overbrowning.
Benefits of Making Bread in a Blender
Making bread in a blender simplifies the process and reduces the amount of physical effort required. Here are some benefits:
- Time-Saving: Blending the ingredients speeds up the preparation process.
- Consistency: A blender ensures a smooth and consistent mixture.
- Ease of Use: Perfect for beginners who might find traditional bread-making techniques challenging.
Why This Recipe is Perfect for Breakfast or a Snack
This bread is versatile and can be enjoyed at any time of the day. Here’s why it’s perfect for breakfast or an afternoon snack:
- Quick Preparation: Minimal ingredients and steps make it quick to prepare.
- Nutritious: Packed with protein from the eggs and milk, and carbohydrates from the flour.
- Customizable: Add your favorite toppings or mix-ins like nuts, seeds, or dried fruits.
Conclusion
This simple and easy bread recipe made in a blender is a fantastic option for anyone looking to make homemade bread with minimal effort. Perfect for breakfast or an afternoon snack, it’s both delicious and nutritious. Try it out today and enjoy the satisfaction of making your own bread!
Simple and Easy Bread in a Blender for Breakfast or Afternoon Snack
Ingredients
Instructions
Preparing the Mixture
- Blending the Wet Ingredients: Begin by placing all the ingredients except the flour into a blender. This includes the warm milk, eggs, salt, sugar, baking powder, and butter. Blend until you achieve a smooth mixture. This ensures that all the ingredients are well incorporated and the butter is evenly distributed.
Forming the Dough
- Incorporating the Flour: Gradually add the flour to the blender mixture, mixing well until you form a dough. This should take about 15 minutes. Be patient and ensure the flour is fully integrated to avoid lumps.
Preparing for Baking
- Preparing the Pan: Pour the dough into a greased and floured baking pan, spreading it evenly. This helps prevent the bread from sticking and allows it to rise properly.
- Letting the Dough Rise: Let the dough rest for about 30 minutes, or until it doubles in volume. This step is crucial as it allows the yeast in the baking powder to activate, giving the bread its light and fluffy texture.
Baking the Bread
- Preheating the Oven: Preheat the oven to 180°C (350°F). This ensures the oven is at the right temperature when you’re ready to bake.
- Brushing the Dough: Brush the top of the dough with a mixture of beaten egg and a little milk. This step gives the bread a beautiful golden-brown crust.
- Baking: Bake for 35 to 40 minutes, or until the top is golden brown. The baking time can vary slightly, so keep an eye on the bread towards the end of the baking period.
Finishing Touches
- Cooling and Serving: Remove the bread from the oven and let it cool slightly. Then, remove it from the pan. Serve as desired, whether it’s with butter, jam, or simply on its own.
Looking forward to trying this. It seems very simple
Thank you for this review