Easy Homemade Refrigerator Dill Pickles

I’ve been making these quick refrigerator dill pickles all summer — they’re crisp, garlicky, and ready fast. This version uses Kirby cucumbers, a simple hot brine, and fresh dill to give you tangy spears that elevate sandwiches, burgers, or a snack plate. I like them because they’re forgiving, fast, and don’t require canning; you’ll have crunchy pickles in 24 hours and better flavor after a few days.
Why you’ll love this dish
These pickles are the kind you can make on a whim: minimal equipment, inexpensive ingredients, and big flavor. They’re perfect for when your garden is overflowing with cukes, or when you want a crunchy, acidic counterpoint to rich foods like pastrami, fried chicken, or grilled cheese. Because they’re refrigerator pickles (not shelf-stable canned pickles), you skip the whole water-bath process and still get reliably safe results when stored properly.
“Crisp, garlicky, and addictive—ready after a day and even better after a week.”
If you’re prepping a snack board or a backyard sandwich spread, these come together faster than baking a pizza crust (or trying out that no-yeast pizza dough I like to use), and they add instant freshness to any meal.
How this recipe comes together
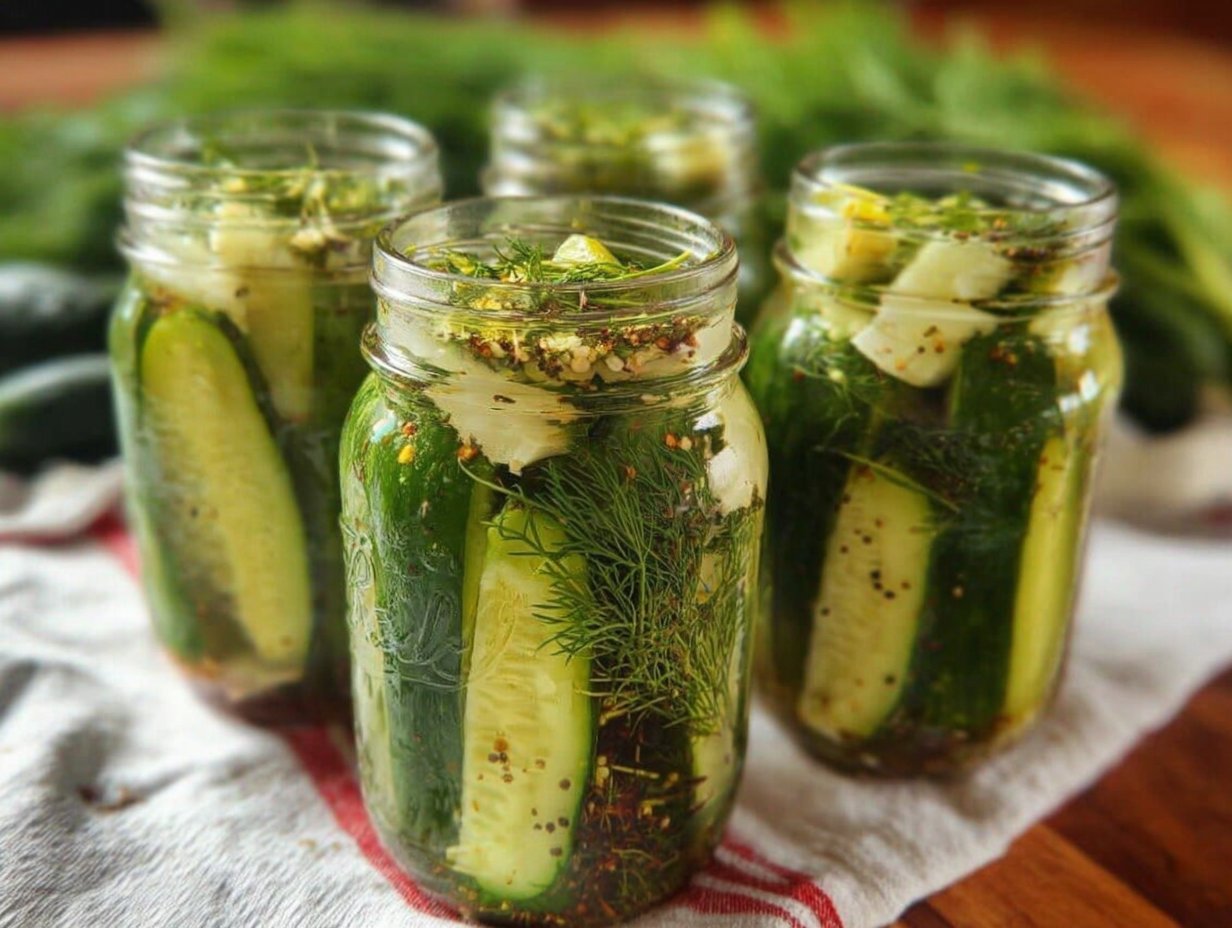
- Slice Kirby cucumbers into spears or coins and pack them into clean pint jars with springs of fresh dill and smashed garlic.
- Make a hot brine of apple cider vinegar, water, salt, sugar, and the pickling spices until dissolved.
- Cool the brine slightly, pour it over the cucumbers so everything is submerged, and seal the jars.
- Chill in the refrigerator; the pickles are crisp and tangy after 24 hours and continue to develop flavor over the next week.
This overview gives you a quick sense of the workflow: prep cucumbers → heat brine → combine → refrigerate.
Gather these items
- 8–10 Kirby cucumbers, sliced into spears or rounds (Kirbys are firm and stay crisp)
- 10 sprigs fresh dill weed (or 2–3 heads of dill)
- 1 1/2 cups apple cider vinegar (substitute white vinegar for a sharper bite)
- 1 1/2 cups water
- 5 cloves garlic, smashed
- 3 teaspoons pickling salt or kosher salt (do not use iodized table salt)
- 1/2 teaspoon granulated sugar (balances acidity)
- 1 teaspoon whole black peppercorns
- 1 1/2 tablespoons pickling spice OR 1 1/2 tablespoons whole yellow mustard seeds for a cleaner look
- 1/2 teaspoon crushed red pepper flakes (optional, for heat)
Notes/substitutions: Use Persian or English cucumbers if Kirbys aren’t available. If you prefer less heat, skip the red pepper flakes. For a lower-sodium option, reduce salt slightly but expect a trade-off in flavor and preservation.
Step-by-step instructions
- Wash cucumbers thoroughly and trim the blossom ends (they can contain enzymes that soften pickles). Slice into spears or rounds to your preferred thickness.
- Sterilize pint-sized mason jars and lids by washing in hot, soapy water and rinsing well; for extra safety, run them through the dishwasher on hot. Pack each jar tightly with cucumber slices and 1–2 dill sprigs. Leave about 1/2 inch headspace.
- In a medium saucepan combine apple cider vinegar, water, smashed garlic, pickling salt, sugar, black peppercorns, pickling spice (or mustard seeds), and red pepper flakes. Heat over medium until it just comes to a simmer and the salt and sugar dissolve. Do not boil vigorously.
- Allow the brine to cool to warm (not piping hot). Spoon some whole spices and garlic into each jar so flavor is distributed. Pour the warm brine over the cucumbers until they are fully submerged. Tap jars gently to release trapped air and add more brine if needed, maintaining the 1/2 inch headspace.
- Seal jars tightly and refrigerate. The pickles will be crisp and pleasantly tangy after 24 hours, but flavor improves over 2–5 days.
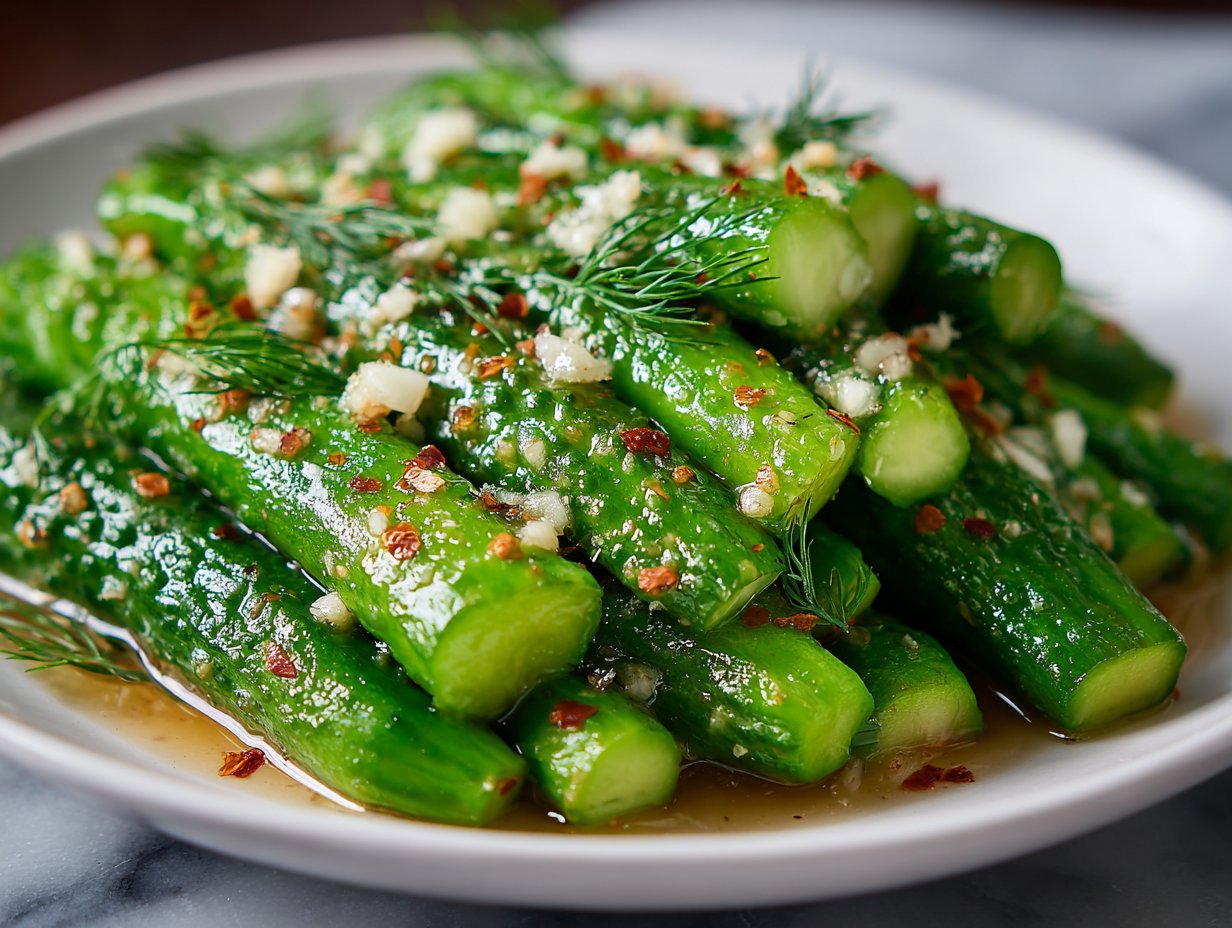
Best ways to enjoy it
These pickles shine alongside rich or fried foods. Try them with:
- Sandwiches and burgers — their acidity brightens fattier fillings.
- Cold-cut platters or charcuterie — they add crunch and cut through cheese.
- As a zesty garnish for Bloody Marys or potato salad.
- On a snack board with pretzels and mustard — they pair particularly well with warm, soft pretzels if you’re serving a game-night spread.
Serve straight from the jar or arrange spears on a small plate with a few extra dill sprigs for presentation.
Keeping leftovers fresh
- Refrigerate: Store tightly sealed in the refrigerator. These pickles keep best for up to 2 months for quality; always check for off smells, cloudiness, or visible mold and discard if unsure.
- Freezing: Don’t freeze — the cucumbers will become mushy and unpleasant.
- Reheating: Not necessary; serve cold or at refrigerator temperature.
- Food safety: Because these are refrigerator pickles (acidified but not canned), keep them refrigerated at all times and use within the recommended window.
Pro chef tips
- Trim the blossom end of each cucumber — it contains pectinases that can cause softening.
- Use pickling salt or kosher salt; iodized table salt can cloud the brine and affect flavor.
- If you want extra-crisp pickles, add a couple of grape leaves or 1/2 teaspoon of white or black tea (tannins help crispen) to each jar.
- Pack the cucumbers snugly but avoid smashing them so the brine can circulate.
- If you prefer a milder garlic flavor, halve the garlic cloves instead of smashing them.
Flavor swaps
- Spicy Dill: Add 1 sliced jalapeño or 1 teaspoon Sichuan peppercorns for heat and floral spice.
- Bread-and-Butter Style: Increase sugar to 2 tablespoons and add 1/2 teaspoon turmeric for color.
- Sweet Quick Pickles: Replace apple cider vinegar with a mix of 1 cup white vinegar + 1/2 cup apple cider vinegar for a brighter flavor.
- Herb-forward: Swap half the dill for fresh tarragon or add a few coriander seeds for a different aromatic profile.
- Low-sodium: Reduce salt by 25% and increase time in the fridge for flavor development, but expect a gentler tang.
Common questions
Q: How long before these pickles are ready to eat?
A: They’re ready to taste after 24 hours, but flavor deepens after 2–5 days in the refrigerator.
Q: Can I use regular cucumbers or garden slicing cucumbers instead of Kirby?
A: Yes, but Kirbys or Persian cucumbers are preferred because they are firmer and have fewer seeds. If you use larger slicing cucumbers, salt lightly and consider removing some seeds to reduce moisture.
Q: Do I need to can these pickles to store them long-term?
A: No — these are refrigerator pickles. They’re not processed by water-bath canning, so they must be kept refrigerated and used within a couple of months for best quality. If you want shelf-stable jars, follow a tested canning recipe and process in a water bath.
Q: Can I use white vinegar instead of apple cider vinegar?
A: Yes — white vinegar gives a crisper, cleaner acidity. Apple cider vinegar adds a softer, slightly fruity note.
Q: Can I make these low-sodium or sugar-free?
A: You can reduce salt and skip the sugar, but expect a milder flavor and slightly different preservation qualities. Always rely on refrigeration and use sooner if you lower the salt.
Conclusion
If you want an alternate refrigerator-pickle method or another take on flavorings, this Easy Refrigerator Dill Pickles write-up from Self Proclaimed Foodie offers a helpful perspective. For a slightly different no-canning technique and notes on crispness, see this Homemade Refrigerator Dill Pickles (No Canning!) guide for more tips.
- Easy Refrigerator Dill Pickles – Self Proclaimed Foodie
- Homemade Refrigerator Dill Pickles (No Canning!)
Refrigerator Dill Pickles

Ingredients
Cucumber Preparation
- 8–10 pieces Kirby cucumbers, sliced into spears or rounds Kirbys are firm and stay crisp
- 10 sprigs fresh dill weed or 2–3 heads of dill
Brine Ingredients
- 1 1/2 cups apple cider vinegar substitute white vinegar for a sharper bite
- 1 1/2 cups water
- 5 cloves garlic, smashed
- 3 teaspoons pickling salt or kosher salt do not use iodized table salt
- 1/2 teaspoon granulated sugar balances acidity
- 1 teaspoon whole black peppercorns
- 1 1/2 tablespoons pickling spice or 1 1/2 tablespoons whole yellow mustard seeds for a cleaner look
- 1/2 teaspoon crushed red pepper flakes optional, for heat
Instructions
Preparation
- Wash cucumbers thoroughly and trim the blossom ends. Slice into spears or rounds to your preferred thickness.
- Sterilize pint-sized mason jars and lids by washing in hot, soapy water and rinsing well; for extra safety, run them through the dishwasher on hot.
- Pack each jar tightly with cucumber slices and 1–2 dill sprigs. Leave about 1/2 inch headspace.
Make the Brine
- In a medium saucepan combine apple cider vinegar, water, smashed garlic, pickling salt, sugar, black peppercorns, pickling spice (or mustard seeds), and red pepper flakes. Heat over medium until it just comes to a simmer and the salt and sugar dissolve. Do not boil.
- Allow the brine to cool to warm (not piping hot). Spoon some whole spices and garlic into each jar so flavor is distributed.
- Pour the warm brine over the cucumbers until they are fully submerged. Tap jars gently to release trapped air and add more brine if needed, maintaining the 1/2 inch headspace.
Refrigeration
- Seal jars tightly and refrigerate. The pickles will be crisp and pleasantly tangy after 24 hours, but flavor improves over 2–5 days.